The Power of Auto-Migration: Automate Cloud Data Migration
Auto-Migration automates cloud data migrations. Instead of creating a river for each table, you can now use one river to load any number of tables from an on-premise database into a cloud data warehouse, while also ensuring that the data sources continuously match. This eliminates labor-intensive manual configurations, allowing teams to focus instead on high-level data analysis.
How to Automate Cloud Data Migrations in Rivery (Step-by-Step)
- Navigate to the top right hand corner of the screen to create and name a new River.
![]()
- Select Step 1: Source. Choose the relational database you want to pull data from.

- Pick “Multi-Tables” for River mode.

- Select Step 2: Target. Choose the database that will receive the migrated data.

- Choose the Loading Mode. Upsert-Merge replaces matching rows, keeps unmatched rows, and adds new rows. Append only adds data to the table. Overwrite replaces entire tables with the new versions.

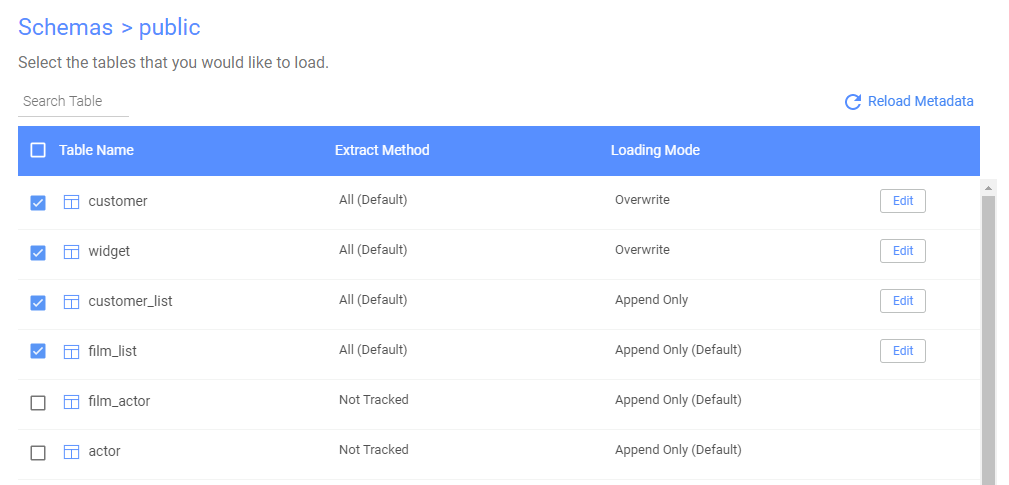
- Select Step 3: Mapping. Mark the tables you want to migrate from the source database. Customize options for individual tables, such as column removal and loading mode.
- Select Schedule if you want run the river at specific time intervals. Shorter time intervals will update the cloud data warehouse with on-premise data in near real-time. With Auto-Migrate, your team can continue to use the on-premise database without interruption, while still ensuring data congruence.

- Select Activity to see a centralized view of the river’s activity, including job status, run time, errors, and more.
